Automata, Carving and Kite Flying by Graham Lockwood

Thanks to Jill Smith, who met Graham at a British Hardwood’s event, we had a fascinating talk on Automata Making, Wood Carving and Kite Flying.

In the beginning Graham was tasked with making clowns for his daughter and from this Automata grew

.


Talking to members, we were all of the opinion that none of us had the skills to produce the mechanisms that made the automata work.    We all bring something from our past into our carvings and I have asked Graham about this.   He replied that” he was an Apprentice trained mechanical engineer. City and Guilds part 1 and 2. Self Employed Engineer. Studied for three years at Graphic Design.     He was lucky enough to get into a drawing office which developed his skill of being able to visualise things in three dimensions. Retrained as a Design and Technology teacher.   Helping pupils with their ideas certainly helped with designing automata.      Joining a woodworkers group certainly lifted his skills at automata building to a much higher level.

Getting started to build automata   ..  it certainly helps if you copy very simple example and get an understanding of how different mechanisms work. Looking at a complicated automaton is frighteningly deceptive. Breaking each aspect down to its individual mechanism simplifies things.”

I asked how many different types of mechanisms he had used, and he answered with a question “How many types of movement are there?”       He answered his own question with “Only 4 , Linear, Rotary, Reciprocating and Oscillating”

  • Linear motion is movement in a straight line, such as a train running down a straight track or a cyclist riding on a level road.
  • Rotary motion involves spinning around a fixed axis, like a bicycle wheel turning or a ceiling fan
  • Reciprocating motion is repeated up-and-down or back-and-forth movement, such as the piston in a car engine or a water pump.
  • Oscillating motion is a swinging movement around a pivot point, similar to the pendulum on a clock or children playing on a park swing.

Waving Hand

This is an example of Rotary motion.   Turning the handle on the left turns a wheel / cog in the middle, which turns another wheel / cog connected to the hand.   The automata changes the rotation from vertical to horizontal., rather like the cogs in a wind or water mull for grinding corn.

Jumping kangaroos


Are they only jumping or doing something naughty

This example brought questions from his class of 12 year olds who were a bit more worldly wise than we would hope.   I think that this is Reciprocating motion

Running Comic figures

The sort of hero found in the Beano.   A student came up withe the idea and Graham had to make it work.

Dancing figure

This had the same sort of movement as the things other people have on their car dashboard, some sort of pendulum is activated by movement and perpetuated.     Graham’s also had a motor that just kept her dancing

I did not really understand this one.  The person in the green hat is hitting a ball into a glass, but there was a lot of other things going on too.

Lionfish and other sea dwellers

We only saw this on a screen as it is as delicate as it looks.    The plaice opened it’s eyes, and the shell opened to.   All sorts of bits of the lionfish moved too.

stripped down to see the mechanism


Explanation of mechanism.

We then went on to his carvings which were as meticulous as his automata.

Carved Lionfish

Amazed??    Remember he has been trained as mechanical engineer and I think those skills were employed with this carving.

Japanese figure

He can carve figures too

More figures

Graham making 3 kites dance to music.  Each kite is controlled by 2 lines – a kite in each hand and the third connected to both sides of his waist.

Graham travels the world to kite flying shows with more guaranteed steady wind than is found in the uk

A Carvers Progress by Melanie Windle

Melanie took us through her carving career and the people who had influenced her – providing inspiration, ideas, styles and techniques.

Florence Sutcliffe started her interest in woodcarving by dragged her out of a queue for a night school class in Yoga, into the queue for Vic Bently’s wood carving class.   Vic taught her the basics of carving and suggested as a guide to future work that 2D and 3D work should be alternated so that the carver maintained the different skills.


Melanie’s first two carvings

Florence was an artist who influenced all carvers who met her and any who admired her inventive work.

Later Melanie took up chip carving inspired by George Moore.


Greenman Trivet

This sort of project is quick and easy once you have got your hand / eye coordination sorted, and makes ideal presents.

From John Adamson she took ideas about finding original thoughts, designs and ideas from the shape of the log and the twists of the grain.


The shape of found and drift wood  inspired her collection of spoons.    Perhaps not always the most practical of spoons but they bring back memories of the day the wood was found.


From Nick Panteledes she learnt about precision.


She likes the precision to have a bit of a twist and to include the vagaries of the wood rather than excluding them to show that the material is wood and not plastic.


The key rings are made from a yew tree at Buttermere and been carved to bring out the beauty of the wood.

The  carved ammonite looked fine to me but Melanie pointed out that the top did not match the underside.     It is nice to have some standards by which one judges ones work

The current work, a low relief of some woodworking tools, encompasses the precision, the reference to natural wood, and illustrates the a requirement to make the things that should be under other things look as if they are

current work in progress


You can see more of Melanies work at https://landcwoodcarvers.co.uk/galleries/member-carvings/ and click on her name.


Do you believe in Father Christmas? by John Adamson

John asked members “Do you believe in Father Christmas?”

Four Romantics raised their hands , and John assumed that the rest were Realists, or Don’t Knows

He had some bad news, there were other myths that were not true.

  • There are NO Self Sharpening carving tools
  • There are NO Tool Sharpening Fairies
  • There are NO Tool Sharpening Elves
  • The tools, that they had  bought as  pre-sharpened and honed razor sharp ready to use, get blunt the same as any other tool.

So Members have

  • Sharpen their own tools
  • Get someone else to sharpen them
  • Or use blunt tools which is dangerous

For some months, John had watched the use of the grinding machines.   Often he was the only person using them.     Sometimes the machines are not brought out!!    That’s no excuse as management says members have only to ask!

He thought that there are two reasons for this sorry state of affairs

  1. That Members don’t know that your tools are not as sharp as they should be.
  2. That although members  have had Nick’s talk about using the machines, but they just lack confidence.

He thought that he could help with both of these.

When he asked about the state of member’s carving tools, few have a valid way of assessing sharpness.  His way is to run your thumb along the edge.  If it starts to cut into the skin it is sharp.    There was a general reluctance to take up this practice   There is an alternative.

An ordinary plaster stuck to a block of wood.  Run the edge of the tool along the padded bit of the plaster.

  • If it just polishes the plaster – it is Blunt.
  • If you have to put a lot of pressure on the tool to get it to cut – it is Not Sharp
  • If just the weight of the tool is enough to cut the plaster – it is Sharp.

For those not confident with the grinding machines he offered to stand with them as they used the machines to provide guidance if required.

Marquetry by Adrian Carter

Adrian became so interested by examples of marquetry seen whilst on holiday in Sorrento in 2016, that he he took a 6 weeks course run by Leeds Marquetry Group the next year.   He joined the group which is almost 70 years old, and is a good source of information, kits and veneers.

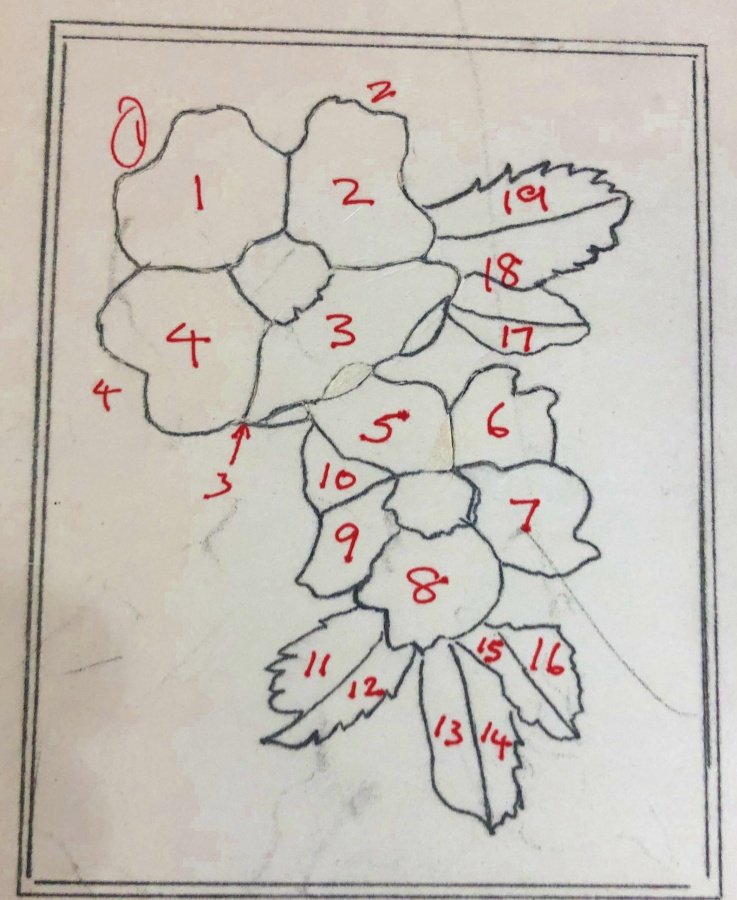
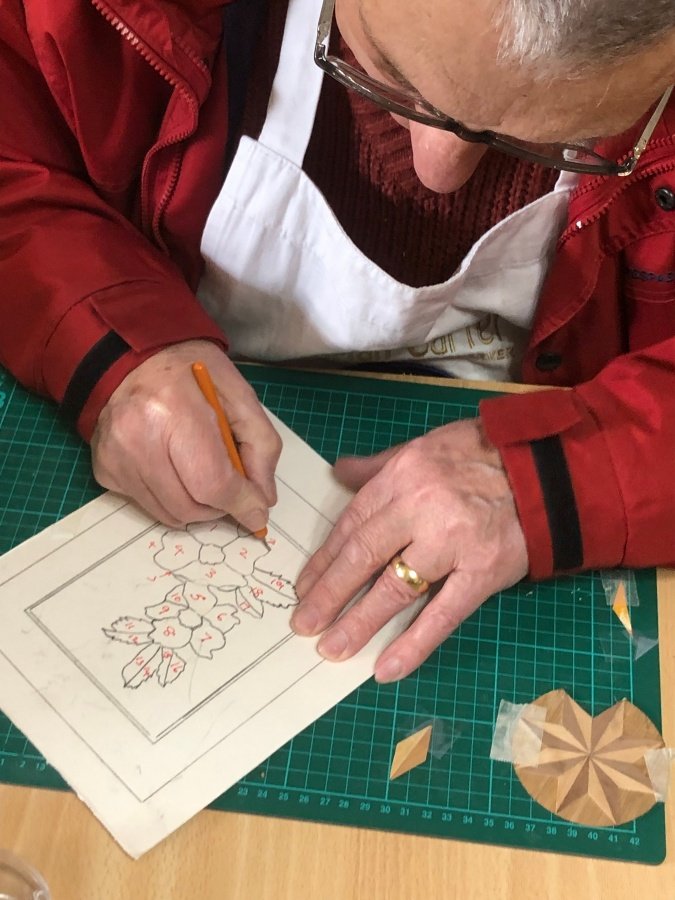
Adrian uses the Window method of marquetry.   An outline drawing of the subject is traced onto a piece of breakfast cereal cardboard which fortunately is the same thickness as the veneers.

Veneer is taped to the back of the cardboard, and using a sharp scalpel blade, the shape of a piece is cut round.   The angle of the cut to vertical is important.   It needs to be at 10 degrees off vertical so that the actual cut side is vertical.    This compensates for the width of the cutting blade.  Care has to be taken that the front of the veneer is top most.    There is apparently a front and back to veneers.

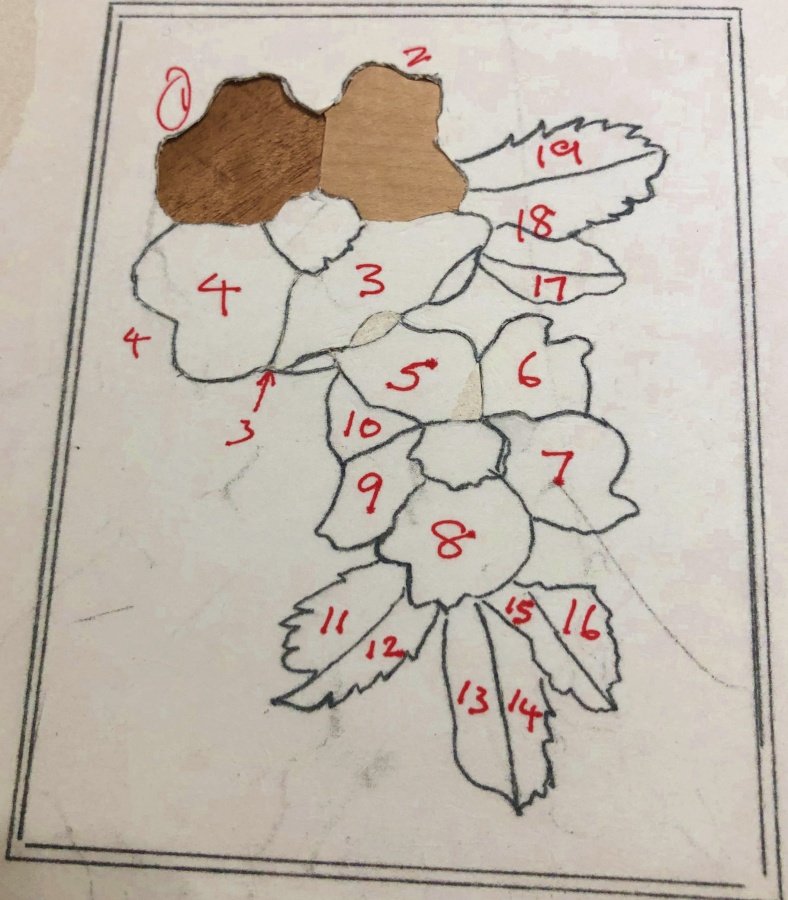
Cutting the out the shape of the first element of the design

The cut out veneer is then taped into position on the back of the cardboard.   Then the next shape can be cut and that is again taped to the back of the cardboard.

Two shaped bits of veneer in the design

When all the shapes have been cut the work is then glued to a MDF baseboard using Titebond Cold Press for Veneer and left for a day.   Ordinary PVA glue does not work well.    The work is put into a homemade press rather like a flower press.    As not all veneers are exactly the same thickness the whole work is sanded with a rotary sander.    Any gaps between the pieces of veneer can be filled with PVA glue.   Upto 12 applications of Sand and Sealer are applied with gentle sanding when necessary.   Finally a wax finish is applied.

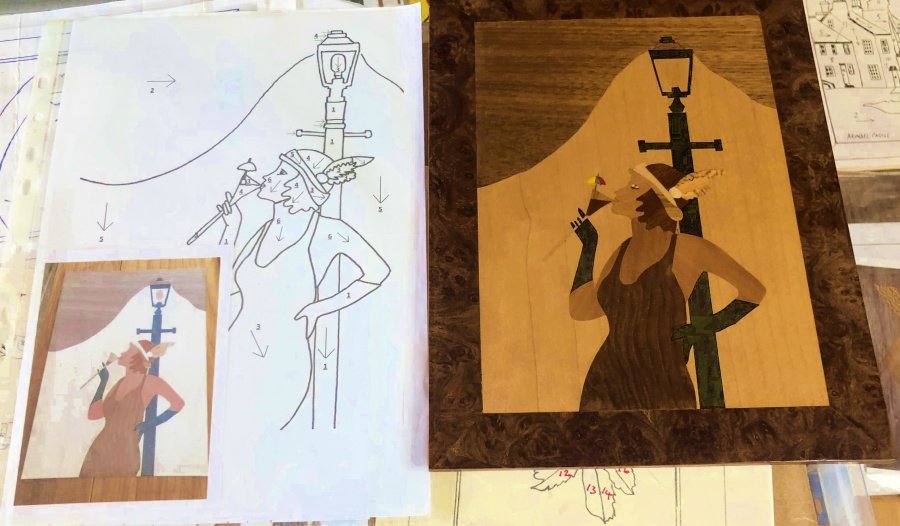
Above is an example of the original picture, the outlined plan for the work, and the finished work.   This was from a kit and the plan helpfully shows the direction of the grain so that the flesh of the arms etc goes in the direction of the limb.

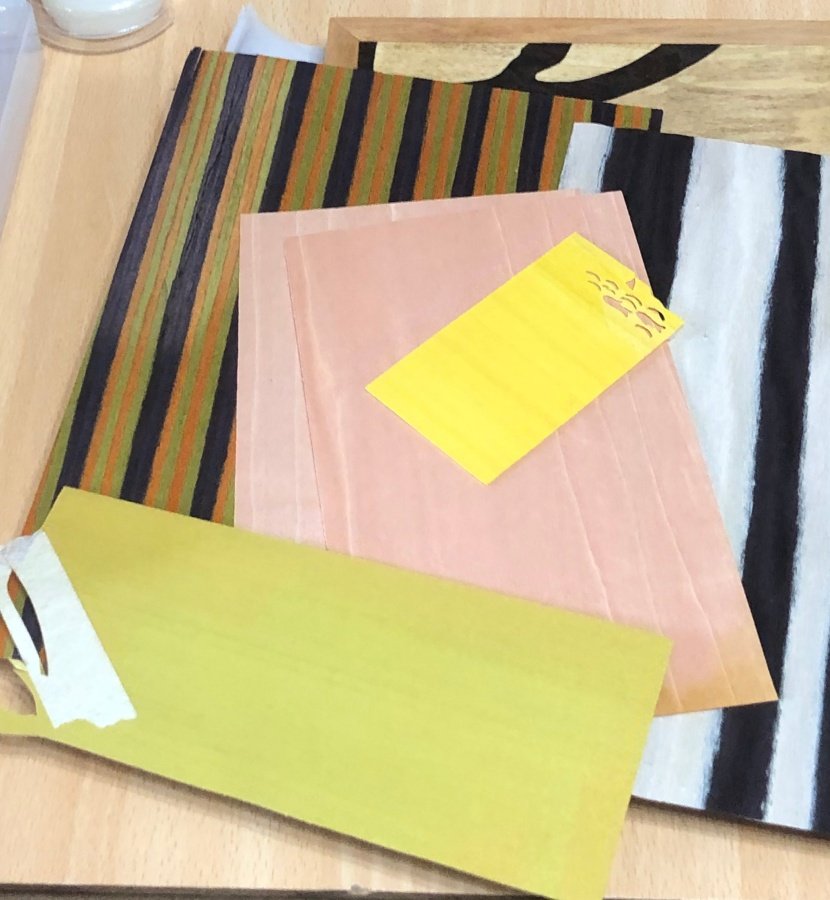
Not all the colours required for a piece of work can be sourced from natural woods, so dyed veneers are available.    The dye is forced into the wood under pressure and is stable.   All through the wood is coloured so there is no fear of cutting into a veneer and finding some of the original white of the wood.  There are some quite exciting colours available.

Dyed veneers

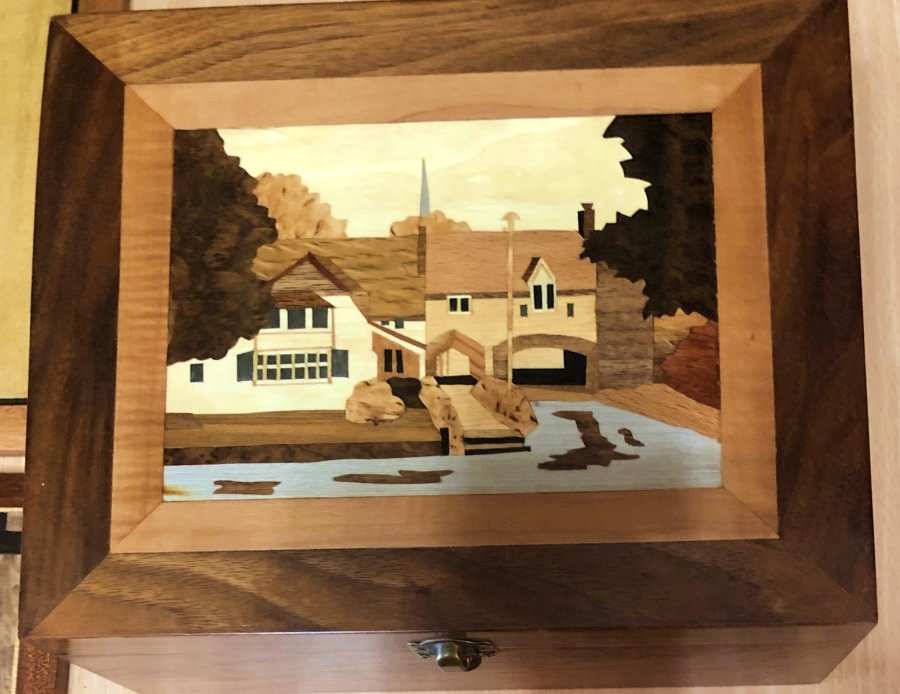
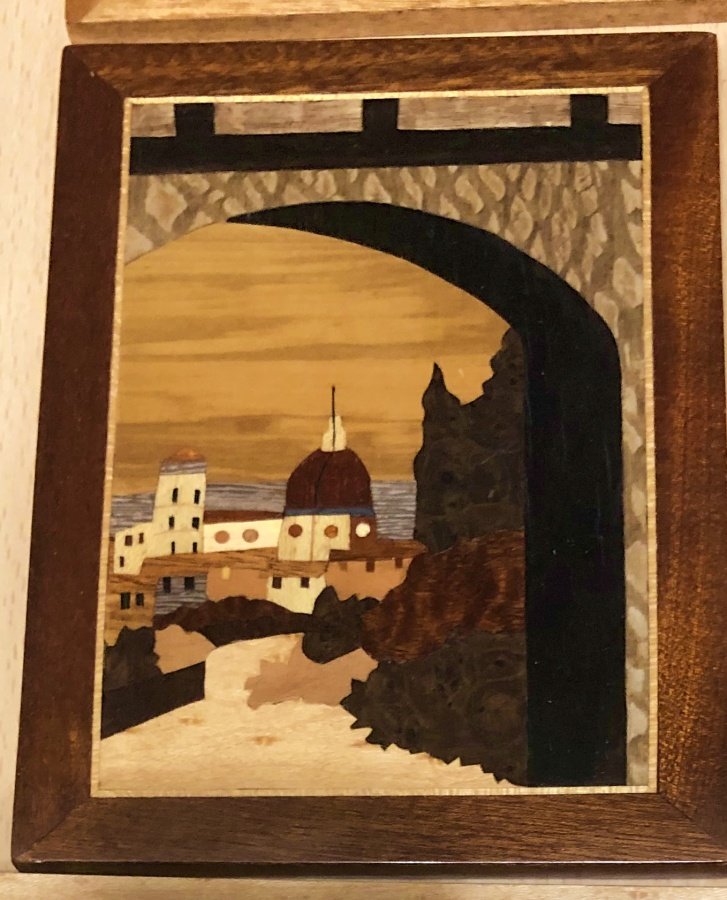
Some more examples of Adrian’s work


Rated as very complicated and tricky by Adrian

Created from one of Adrian’s own photograph


Phil Palmer’s 3D trip down Memory Lane

Phil showed us people, places and work that I had forgotten about in wonderful 3D.     Some images really jumped out of the frame on the screen.

The technology was impressive.     Phil had two images on his screen and the projector alternated between the left and right 60 times a second.

Phil and the computer screen


Test Card on the computer


Test Card on the screen


We all had glasses which could be synchronised to the projector by pressing a button.


Image on screen seen through the glasses


This does not give the 3D effect that we saw but shows that the image was clear.  It was much better than viewing them slides without the glasses

Image on screen without the glasses


I personally found that an hour of watching the slides had given me eye strain, but I was writing notes and taking pictures so it was perhaps not typical.

I asked Phil about the camera.   He has two with different focal lengths.  One was best at subjects between 2 and 8ft, and the other was for more distant subjects.   The cameras have two lenses


Planning a Carving by John Adamson

When John worked at B.T. they used the catchphrase: Planning is cheap, Correction time is expensive. A recent client of his reminded him of The 5 Ps: Perfect Planning Prevents Poor Performance.   Planning is important and this particularly applies to us, as we carve wood, we cannot put back what we have cut off.

Books and magazines do the design planning for us  but they don’t tell us how to plan our own designs. If we want to carve a life like animal from a photograph   John demonstrated this with a photograph of a table with a animal face stuck to it,

 .


A table/animal has 4 equal sized legs, but in the photograph all the legs are different sizes.     These differences are due to perspective, and he had not found a way to unpick the problem  perspective.   We must be aware of this and find other more accurate sources.  Plastic models can help, and he had found that those produced by  Schleich are anatomically accurate but expensive.

John suggests:

1) Choose the carving you want to do.

2) Get photos of top side and front views if possible, If necessary go to shops, natural history museums, etc. to take photos.

3) Think size and choose the wood with extra wood for clamping.

John recommends using plasticine.  A complete but not necessarily an accurate model may be helpful to start with, but he suggests that if you are having a problem with the head or the feet then just make a plasticine model of that part the carving, carve the plasticine to see how the problem can be fixed.

John reminded us to think about where the carving will be exhibited. e.g., a relief carving needs to consider whether it will be high or low and where the light hits it to make shadows. He demonstrated this with Melanie’s latest carving. Another example would be a statue very high up in a cathedral – it would have a big head and chest and smaller legs to make it look normal to the viewer.

The meeting closed with members sharing their problems and views. Some members shared the pleasure of carving freely and being happy with their results. John, whose  talk was about planning, reminded us that as a species we are not natural planners, we are more “the get up and do it” type of people. We can carve from  the heart and complete a carving. But if we are not happy when the carving is completed we may need help for the next time.. We can  look at other models, real animals and drawings in books with zoological pictures of animals’ skeletons which would help with the structure and movement of the animal.

Report by Gillian Smith.

How to build a Viking Ship

19th October – A talk of two halves ….

19th OCTOBER 2019 – A TALK OF TWO HALVES … JOHN TALKS ABOUT CARVING PETER CROUCH’s HEAD.

In a recent challenge John was contacted by a TV production company                          

and with a couple of weeks notice asked to carve the head of Peter Crouch.


It is due to make an appearance on the “Back of the net”, a Premier League

entertainment show featuring big match action, interviews, fun studio

games and much more… (so the blurb says).

John described the process of carving under pressure at short notice.

The carving is due to be picked up the following day and had about

5 hours of work left before completion.


September Workshop – Bone Carving by Nick Pantelides

Today we had a presentation and a variety of topics from one of our long-standing members – Nick Pantelides

Nick’s morning session wasa discussion on carving in other media such as Bone, Alabaster, Soapstone, Ivory, animal horn and Antler.

Bones need a lot of preparation to ensure all the marrow is removed. this includes first boiling the bones in water, then boiling the bones in bleach and finally boiling the bones with salt and vinegar.

To cut bone Nick uses a hand fret saw, holding the pieces in mole grips or a piece of wood with a V-shaped rest.

It goes without saying that you don’t want to be breathing in bone dust – Always wear a mask.

Nick uses ground down chisels or a dremel for bone carving. When using chisels he uses a scoring action.

To finish off his work he sands to get a smooth finish and there are buffing waxes available.

For staining bone he has used concoctions such as onion leaves and coffee.

When asked about identifying bone versus ivory Nick sent around examples of both to illustrate that? bone has fine black spots and that ivory has a grain.

There was then a discussion Scrimshaw which is a form of carving developed?on whaling vessels and involves carving on bone or ivory and then using the soot from lamps to define the carving patterns.

Again ground chisels or a ground nail is used in a scraping fashion.

To replace the soot Nick has used black boot polish which is put on and then buffed off or black ink, the surface is then sanded to remove the ink from the raised surfaces.